Best PDF Reader Apps on Android Phones – If you deal with PDFs regularly, having the right PDF reader app on your Android phone can make a huge difference.
Whether you need to read e-books, sign documents, or annotate files, the right app can boost your productivity. But with so many options, which one should you choose?
Here are the 10 best PDF reader apps on Android phones that offer great features, speed, and ease of use.
1. Adobe Acrobat Reader
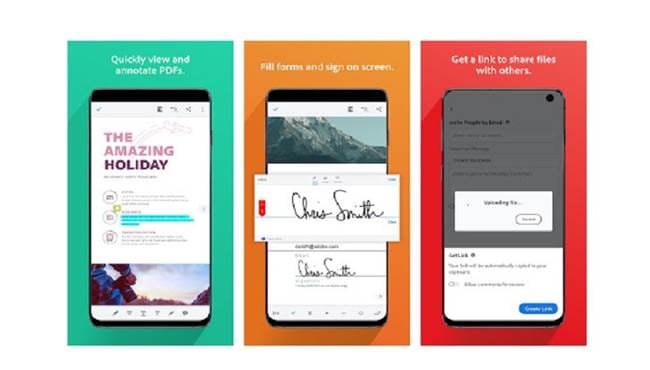
This is the most well-known PDF reader app and for good reason. Adobe Acrobat Reader lets you view, edit, annotate, and sign PDFs effortlessly. The free version covers basic needs, while the premium version unlocks advanced editing and converting tools.
Key Features:
- Supports annotations and digital signatures
- Cloud storage integration
- Fill and sign PDFs easily
2. Xodo PDF Reader & Editor
Xodo is a powerful yet lightweight PDF reader app that stands out with its intuitive design. You can edit PDFs, highlight text, and even collaborate in real time with others.
Key Features:
- Free with no ads
- Night mode for comfortable reading
- Syncs with Google Drive, Dropbox, and OneDrive
3. Foxit PDF Reader
Foxit is a fast and secure PDF reader app that focuses on privacy and efficiency. It lets you add comments, fill out forms, and password-protect sensitive documents.
Key Features:
- Lightweight and fast
- Supports text-to-speech
- Converts PDFs to Word or Excel
4. WPS Office
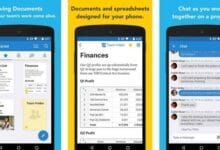
WPS Office is more than just a PDF reader app it’s a full-fledged office suite. You can open Word, Excel, and PowerPoint files alongside PDFs, making it perfect for professionals.
Key Features:
- All-in-one office app
- Built-in PDF converter
- Free cloud storage
5. PDF Viewer – by PSPDFKit
This PDF reader app is known for its clean interface and powerful annotation tools. It offers a distraction-free reading experience with smooth scrolling and zooming.
Key Features:
- Minimalist design
- Advanced annotation tools
- No ads in the free version
6. Google PDF Viewer
If you want a lightweight and simple PDF reader app, Google’s built-in PDF viewer is a great choice. It doesn’t have fancy features, but it gets the job done.
Key Features:
- No installation required (pre-installed on many Android devices)
- Fast and lightweight
- Integrated with Google Drive
7. Librera Reader
Perfect for e-book lovers, Librera Reader supports various formats like EPUB, MOBI, and, of course, PDFs. It’s a highly customizable PDF reader app with a modern interface.
Key Features:
- Supports multiple e-book formats
- Dark mode and customizable themes
- Text-to-speech support
8. MuPDF
MuPDF is an open-source PDF reader app that is extremely lightweight and fast. It focuses on simplicity, making it ideal for those who just want to read PDFs without extra features.
Key Features:
- Open-source and free
- Very small file size
- No ads or unnecessary permissions
9. PDF Extra
This all-in-one PDF reader app lets you scan, edit, and sign PDFs. It’s great for business users who need advanced features beyond just reading files.
Key Features:
- Scan documents into PDFs
- Fill and sign forms
- Cloud storage integration
10. All PDF – PDF Reader & Viewer
All PDF is a simple and effective PDF reader app that focuses on fast performance. It lets you merge, split, and compress PDFs easily.
Key Features:
- Small and efficient
- No internet connection required
- Merge and split PDFs
Also Read: 10 Best CV & Resume Builder Apps on Android
Choosing the right PDF reader app depends on your needs. If you want a feature-packed option, Adobe Acrobat Reader or Foxit PDF Reader are great. If you prefer a lightweight and fast app, MuPDF or Google PDF Viewer will work perfectly.
Whichever one you choose, these apps will make handling PDFs on your Android phone easier and more efficient.